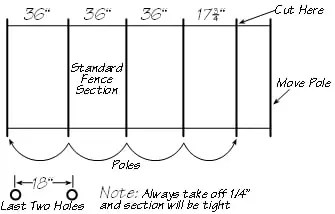
LAYING OUT YOUR JOB
Each will have to be understood one at a time. Remember that the mesh is on the outside of the poles so as you layout on the outside radius, you will have to layout your holes less than 36” centers, This will allow the poles to twist slightly. Since you are going around an outside turn, i.e.; The poles must twist. So in sense, it is farther around a curve than it is in a straight line. You will have to refer to the chart provided as to how less than 36” each hole on the outside turn is laid out. If the radius is sharp, you may layouts as little as 35-5/8 or 35-1/2. refer to diagram.
![]()
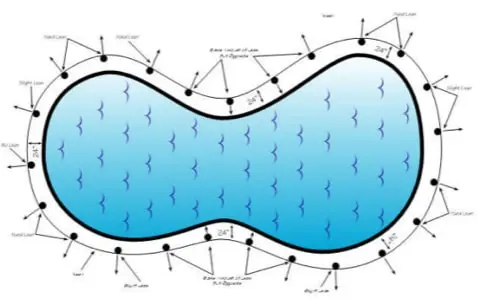
INSIDE RADIUS.
As you can see, the inside radius is laid out further than 36” centers. Due to the severity of the radius, you will again refer to the chart. For starters, the obvious reason for the holes to be farther apart is the distance on an inside turn is less than in a straight line. Remember the mesh is on the outside poles, hence, the mesh will be loose should you drill on 36” center. The poles are twisted back inside. On an inside radius you allow a little less on the difference between holes than on the outside radius. For example, if you layout on the outside at 35-5/8”, you would allow layout at 36-1/4” on the inside radius. The reason for this difference is on the inside radius the poles do not twist as much as the outside radius. See chart. The best explanation for less on inside radius is that the pole has to twist less on the inside as to more on the outside. As you install, this will become a lot clearer to you. If you become confused just refer to the charts. Remember, the mesh is on the outside of the poles. The mesh comes in 15’ sections. Should you measure around the outside of a radius it will be longer than the straight line. The inside will be shorter.